Before a pantry member can place an order to your pantry, a menu must be created. In the Pantry Maintenance screen, use the navigation bar to select Menus to define the menus that they will be ordering from.
Create a Menu

On the Menu screen, select the Add Menu grid in the top right of the list of past Menus.
Note that some pantries are enabled to have multiple sites within their systems. If this is the case, when the "Menu" page is loaded there will be an option to display "All" sites within the drop down pictured in the top right in the image above. If the "All" option is selected you will see all menus across all sites within the system. If a site is selected, you will only see menus created under that particular site. If a new menu is created while the "All" option is selected the new menu will currently be created for the first option in the site drop down that is not "All". If the "All" option is not selected the menu will be created under the selected site. This functionality will be changed in the future so that users will not be able to create new menus while the "All" option is selected within the site drop down.
Menu Details
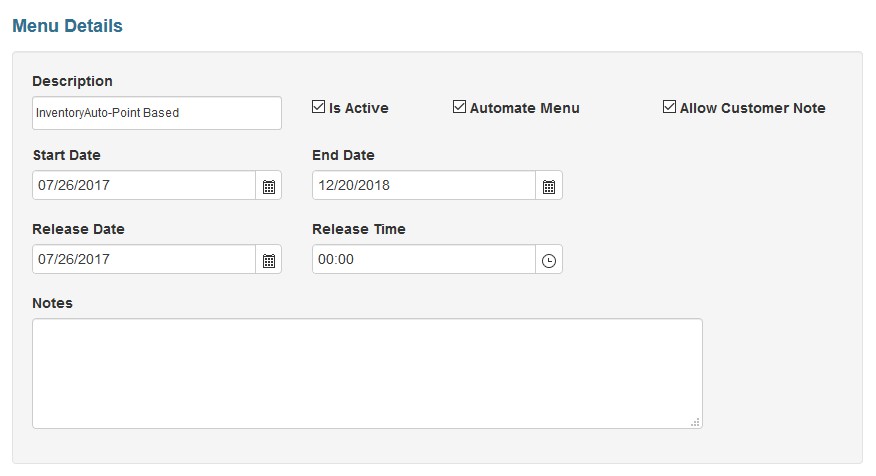
Fill out the menu details fields with appropriate information.
Description - A description of the menu that will act as it's name for internal reference. For example, if it is a special menu prepared for an event like Thanksgiving, you may name it "Thanksgiving 2017"
Is Active - Defaults to check since if you are defining a menu, you will probably want it active. An inactive menu will not be used regardless of the active dates set.
Automate Menu - If your pantry is using the inventory control and tracking aspects of Unicentric, you will be able to select Automate Menu so that instead of adding the food items you would like to make available for each category, the system will automatically add items available.
Allow Customer Note - If enabled, allows a note to be added to the printed order by the pantry member when they are placing the order. This note can be no larger than 50 characters
Start Date - The start date for the menus active time frame
End Date - The date the menu will no longer be available
Release Date - The date the menu will be released and available to be ordered from. This will usually be the same as the start date, but could be made available earlier so that pantry members can place orders ahead of time
Release Time - The time that the menu will be released to pantry members
Notes - Notes made for internal use. These are not visible to the pantry members.
Menu Family Point Limit
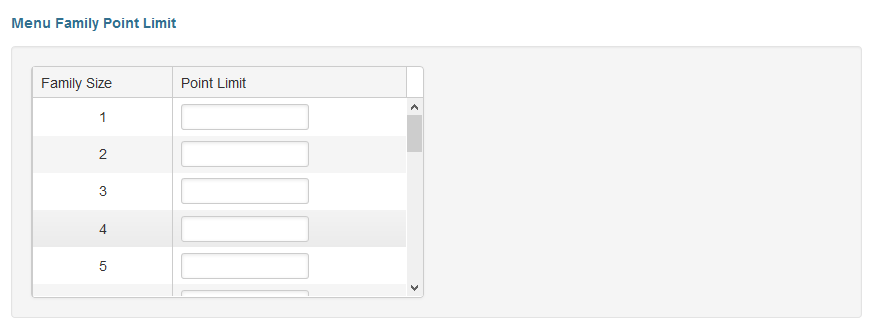
Here you will set the default point limit for families based on the size of the family. Note that the point limit set here can be overridden on a member-to-member basis using their intake form.
Menu Setup
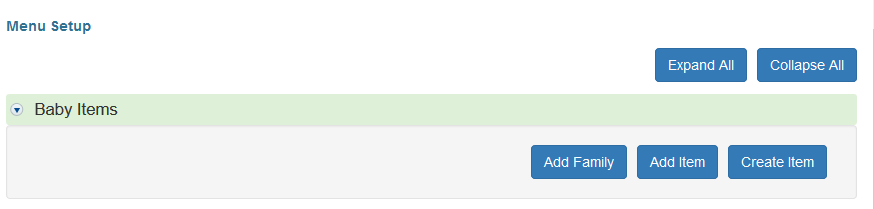
Next you will have to define the menu items and point limits on based on family size and food category. In the example above, Baby Items is the category that we are defining. Click Add Family to add a record for a family size.
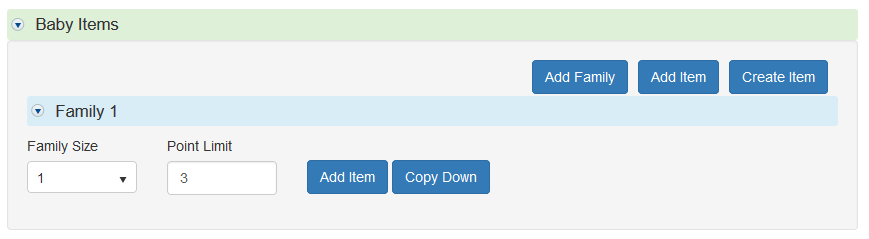
After adding a family size to the category, set the limit for that category in the Point Limit box. If nothing is set, the family can potentially spend all of their allotted points in that category. Click Add Item to add a food item to the category in that menu.
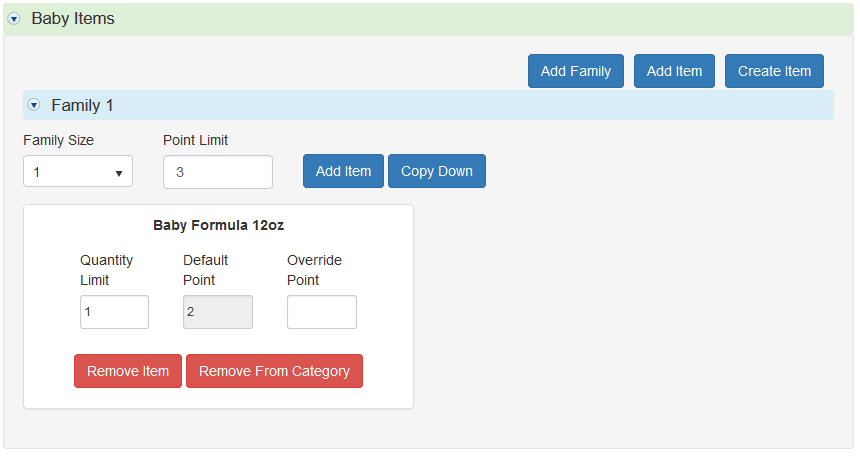
Select the item from the drop down and click Ok and it will be added to the menu as shown above. You can set a quantity limit to limit how many of that item a family of the given size may add, in addition to overrding the default point cost assigned to the item with another value. The remove item button will remove the item from this family size while the remove from category button will remove them from all family sizes they are currently set on.
You can click the Copy Down button to create a Family Size of 2 within the category with the same items added, which should speed up the process of defining the item for all supported family sizes.
After all supported family sizes have been defined for all of your pantries categories, you can save the menu. It will now allow a pantry member to order from the menu while the menu is active.
Copying a Menu

If you are defining a new menu, but it is very similar or exactly the same as another menu, you can create a copy of the existing menu. Find it in the grid of past menus and click the Copy button as shown above.
This will open a Create New Menu screen that is pre-populated with all of the same data from the copied menu. You can change the fields that need to be changed (most likely the active date range and release dates) and save the menu.