Overview
This form is intended to clear appointment exceptions while collecting the appropriate data for reporting purposes. Additionally, we have given the user the ability to directly update the calendar item, even if it is already on the proofing screen. Lastly, we have created a way for users to update the client's home coordinates in case the EVV application user is consistently checking in/out outside of the accepted 200 ft radius.
Requirement to access this form: Depending on the organization it can be a designated person or supervisor responsibility.
Populating the Form
NOTE: Some fields and functionality are organization dependent.
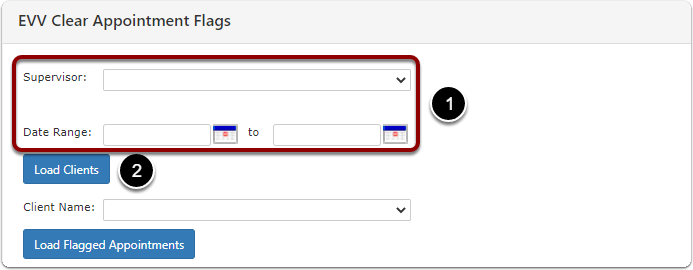
- Fill out all fields above the "Load Clients" button.
- Click the "Load Clients" button. At this point, the form will refresh and populate the "Client Name" drop down with all clients who have a flagged appointment within the specified parameters above.
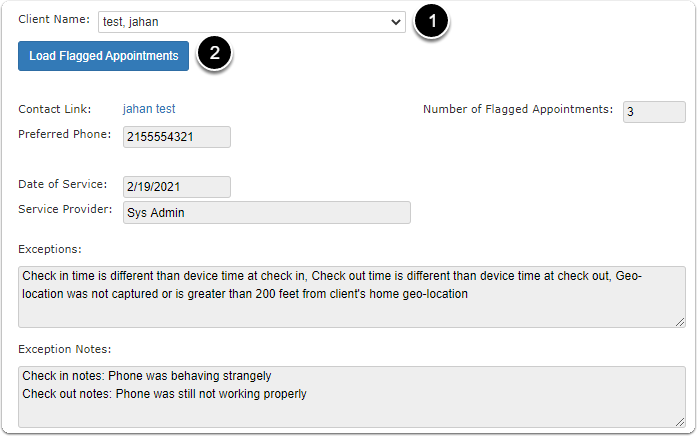
- Select a client in the "Client Name" drop down.
- Click "Load Flagged Appointments". The form will refresh and populate all of the display fields.
The blue text labeled "Contact Link" is a hyperlink to the client's contact screen.
Updating the Calendar Item
Requirement: Update can only occur for calendar items that has not been billed. If the item has been billed, the "Calendar Item" button will not be visible.

Click the "Calendar Item" button to display a popup which will allow you to edit the calendar appointment.
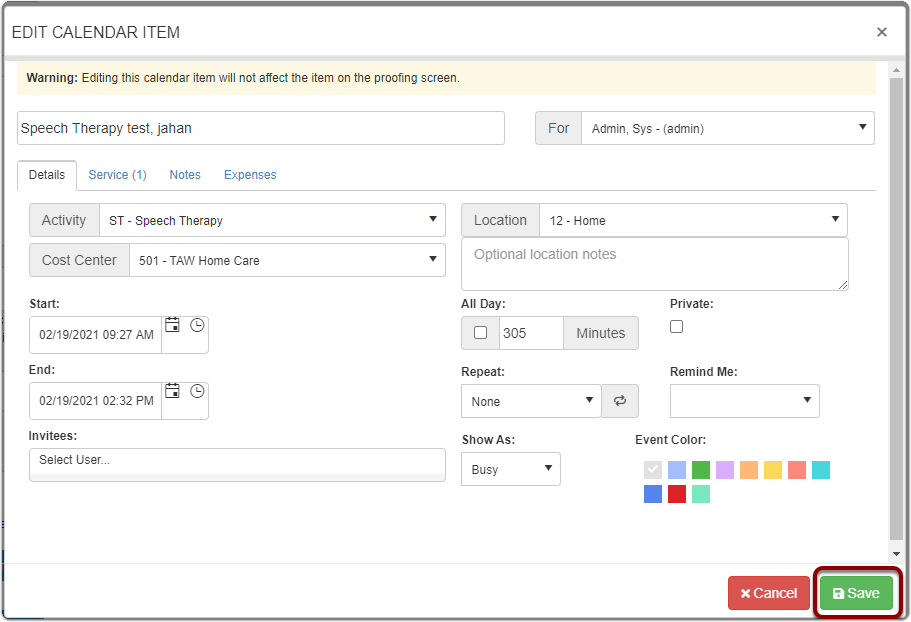
Make any required changes and select the "Save" button to apply the calendar changes.
NOTE: Calendar items with multiple services will have the option of updating, however, only the first service will be updated. Thus, best practice would entail manually altering all multi-service calendar items from the proofing screen. The form has a reminder label in case of this event.

Update Appointment Geo-Location
Requirements:
- Displayed appointment must be flagged for Geo-location.
- Currently selected contact must have coordinates associated with the home address in their contact screen.
This functionality is intended to allow users to update the home coordinates of the client. This is intended to be used when EVV app users consistently check in and out from the same spot over 200 feet from the client's saved home coordinates. This way, users can alter the client's home coordinates so that they are not forced to constantly clear erroneous Geo-location exceptions.

Select the "Update GeoLocation" button to reveal the Google Map widget.
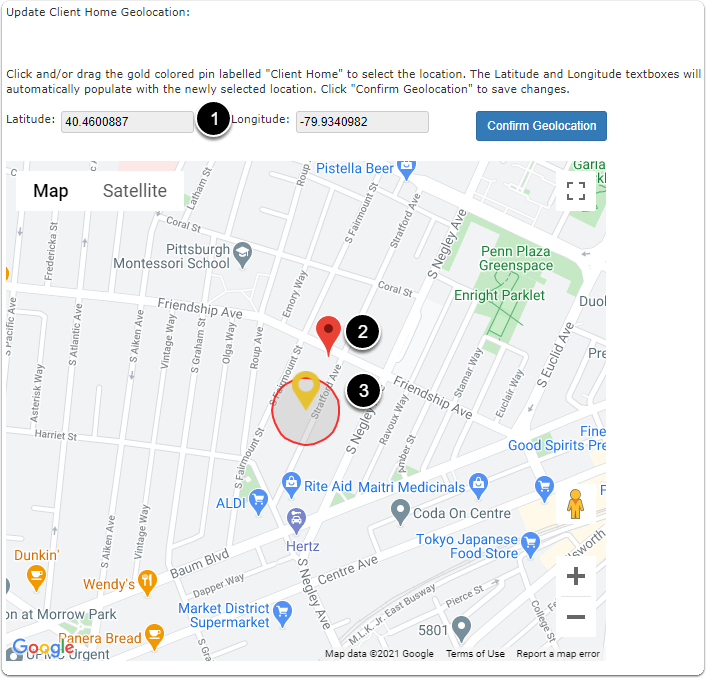
- The coordinates currently saved as the client's home will populate the display fields.
- Up to four red markers will be visible. There is one marker each for current appointment check in, current appointment check out, most recent appointment check in, and most recent appointment check out. Only one red marker is visible here because all four events took place at the same exact location.
- The gold marker represent the coordinates of the client's home. The gray circle with red border denotes the acceptable 200 ft range. Click and drag this marker to the location you wish the client's home coordinates to be updated to.
Hovering over or clicking the markers will reveal which marker it is.
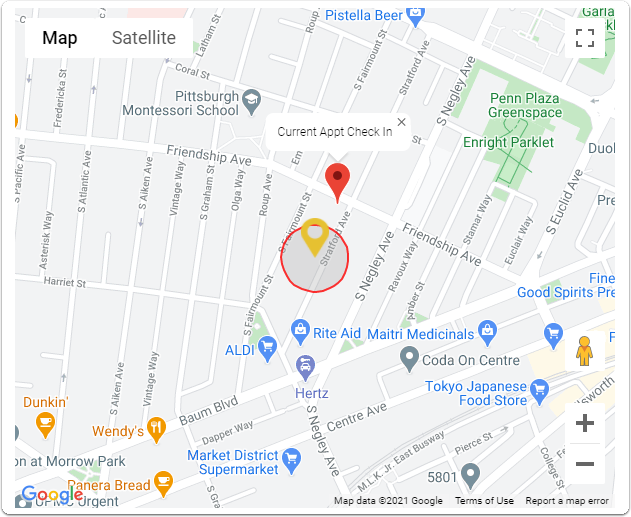
After the "Client Home" marker has been moved.
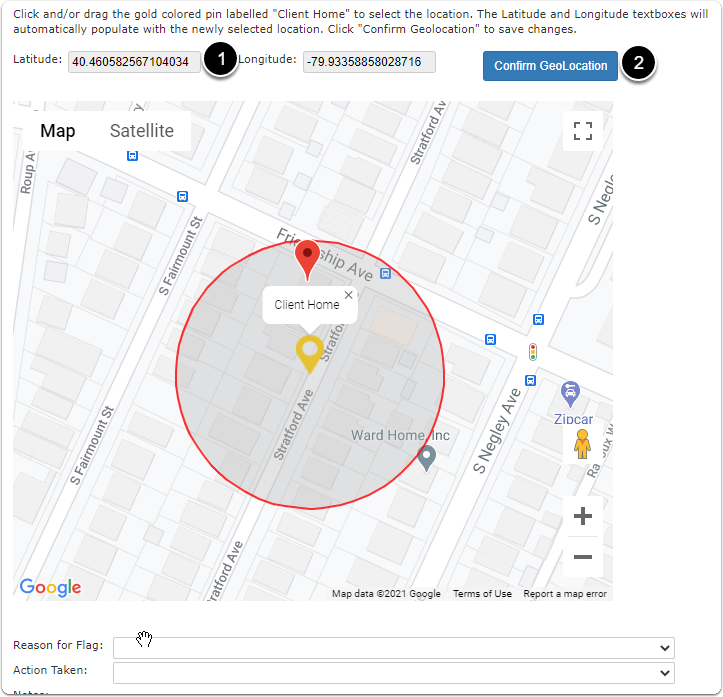
- Note the home coordinates have been updated.
- Click "Confirm GeoLocation" to update the client's home coordinates. After doing so, the form will automatically reprocess all remaining appointments for the selected client and refresh the form. Any following appointments that fall within the new radius will have their Geo-location exception removed.
Before clicking "Confirm GeoLocation"
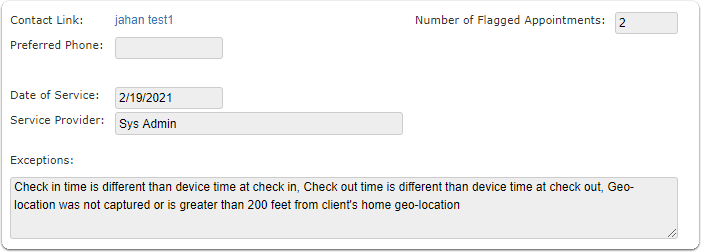
After clicking "Confirm GeoLocation"
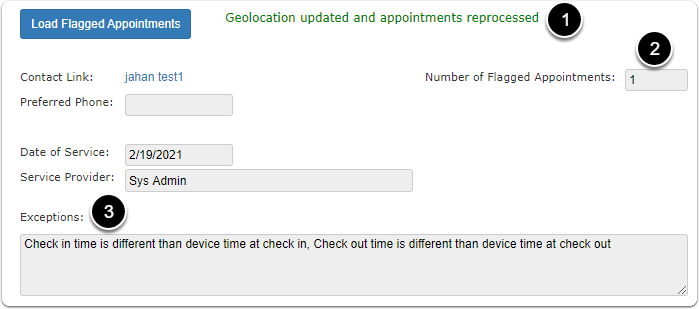
- Note confirmation label.
- Number of Flagged appointments dropped from 2 to 1 indicating the second appointment was solely a Geo-location flag.
- The same appointment exceptions are displayed without the Geo-location exception included.
Clearing Flags
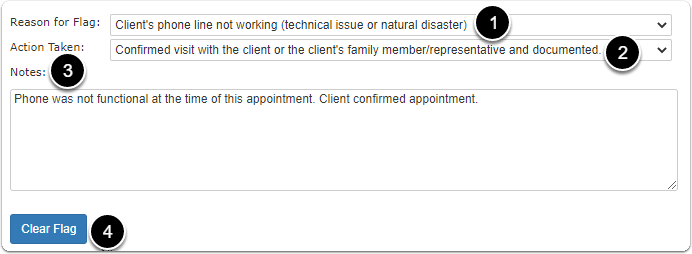
- Select "Reason for Flag"
- Select "Action Taken"
- Enter relevant notes for this flag clear.
- Click "Clear Flag" to confirm clear. The form will refresh and load the next flagged appointment for this client if one exists. If no more appointments exist for this client, select a new client at the top of the form and repeat the same process!